

I'm Venkata Pavan Vishnu, a cloud enthusiast with a strong passion for sharing knowledge and exploring the latest in cloud technology. With 3 years of hands-on experience in AWS Cloud, I specialize in leveraging cloud services to deliver practical solutions and insights for real-world scenarios. Whether it's through engaging content, cloud security best practices, or deep dives into storage solutions, I'm dedicated to helping others succeed in the ever-evolving world of cloud computing. Let's connect and explore the cloud together!
Howdy everyone, Finally I am back with some content. It has always been with Amazon web services. In earlier days, It is hard to predict how much computational power was needed for an application to launch. If we underestimated the computational server is going to crash. If we overestimated we need to pay irrespective of the usage.
Here comes the Amazon EC2. It is a similar kind of thing used to set up a Virtual server with everything like OS, Networking, Storage, etc. It also offers Security, Scalability, Reliability, and more.
Today we will see how to launch an EC2 Instance.
Steps to launch an EC2 instance in AWS Console:
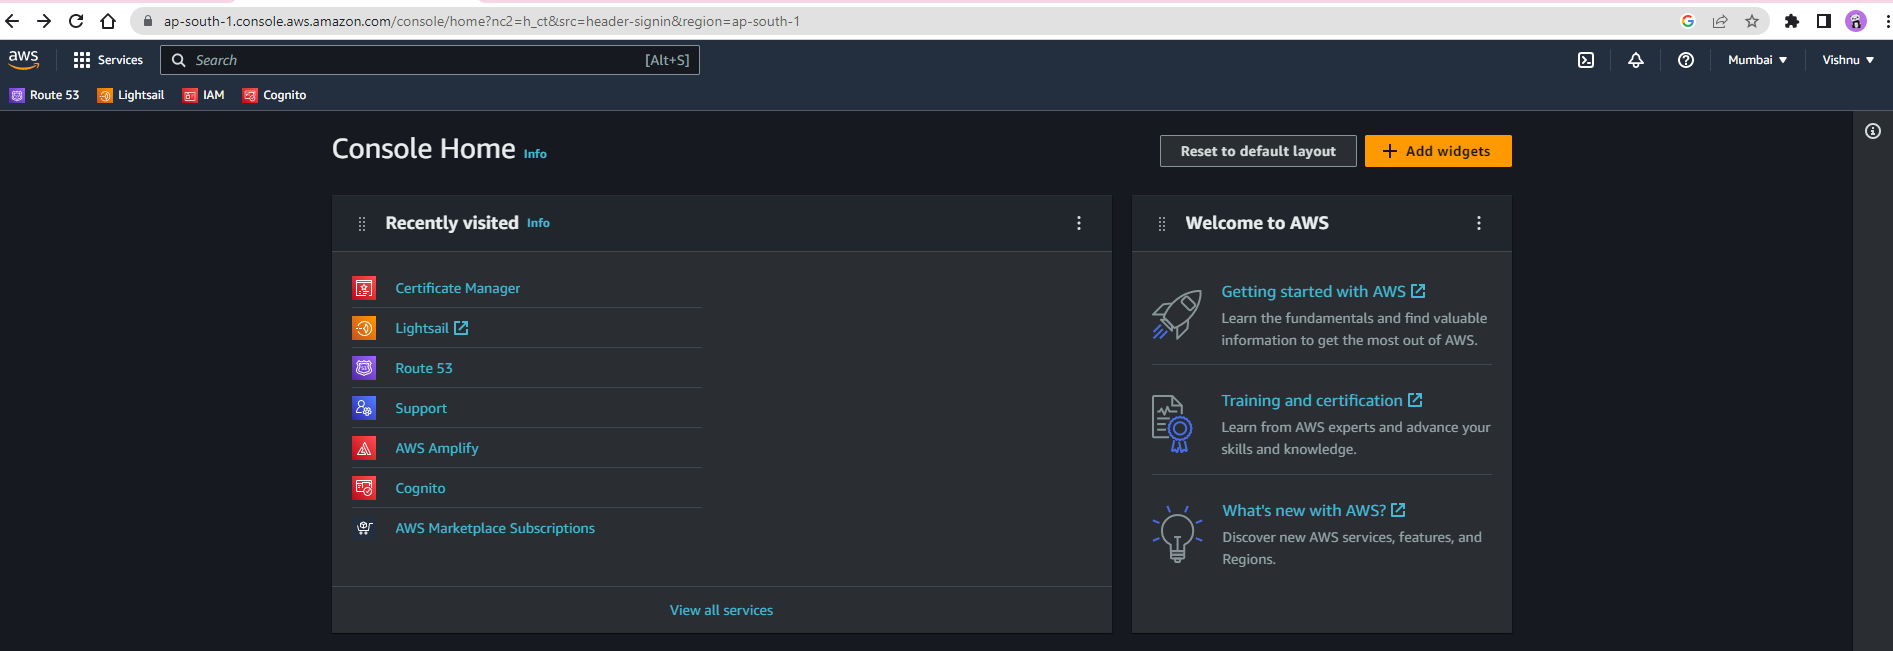
This is what the AWS console looks like; You can choose which region you want to choose the region which is near (It will minimize the latency).
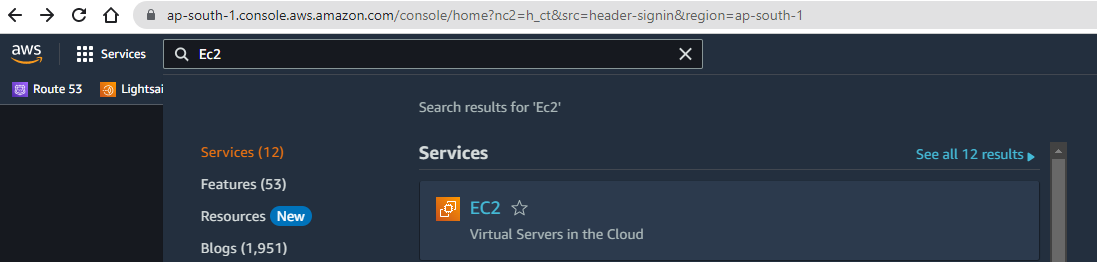
Now search for EC2;
After clicking on EC2, you will get to see the EC2 dashboard below:
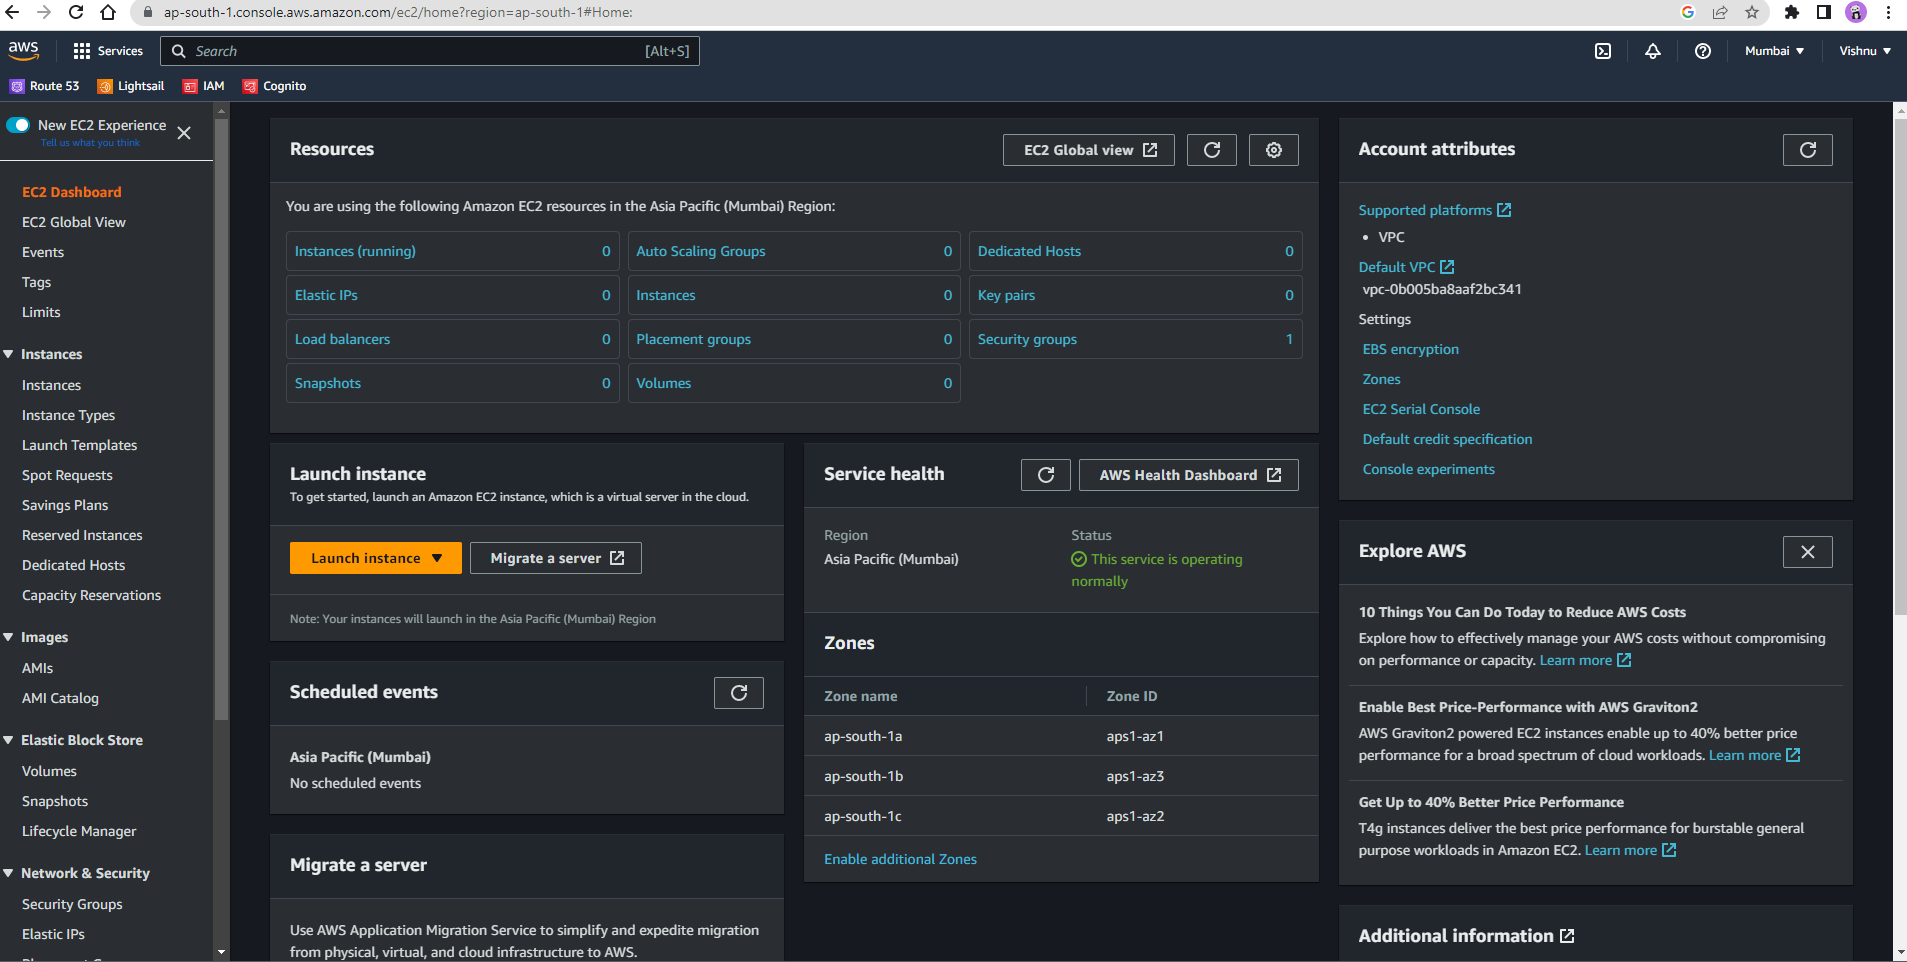
Where you can find more information like the number of instances running, the Load balancer, service health, and more.
Let us create an EC2 instance:
- Click on the instance, and you can see below now we need to click on launch instances and choose the first option for now.

2)Name your instance and choose OS you want to use like Linux,macOS , Redhat , and more. Select the particular AMI(Amazon Machine Image).
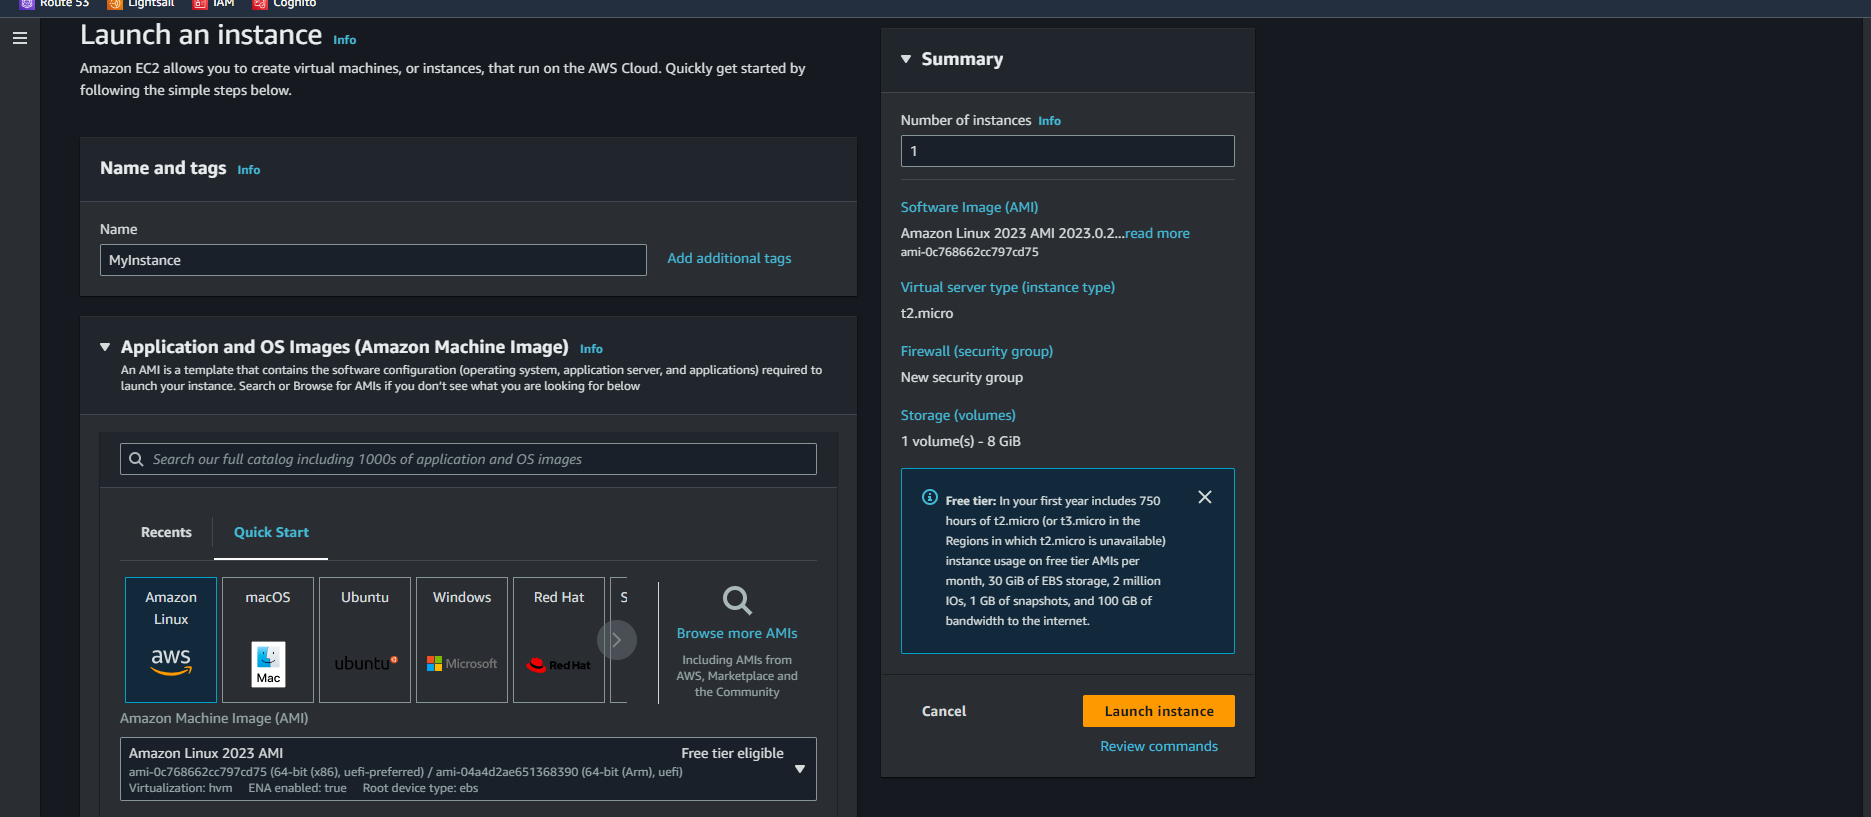
3)We need to choose the instance depending on optimizations like computing power, storage, memory, networking, and capacity. Please, make sure you were opting for a free-tier instance so you won't get billed if your doing hands-on.
t2-micro is free tier with 1vCPU,1GiB memory
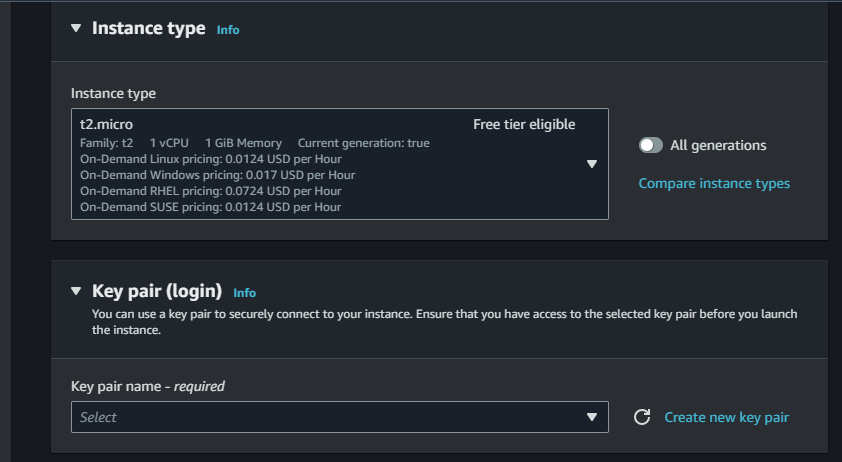
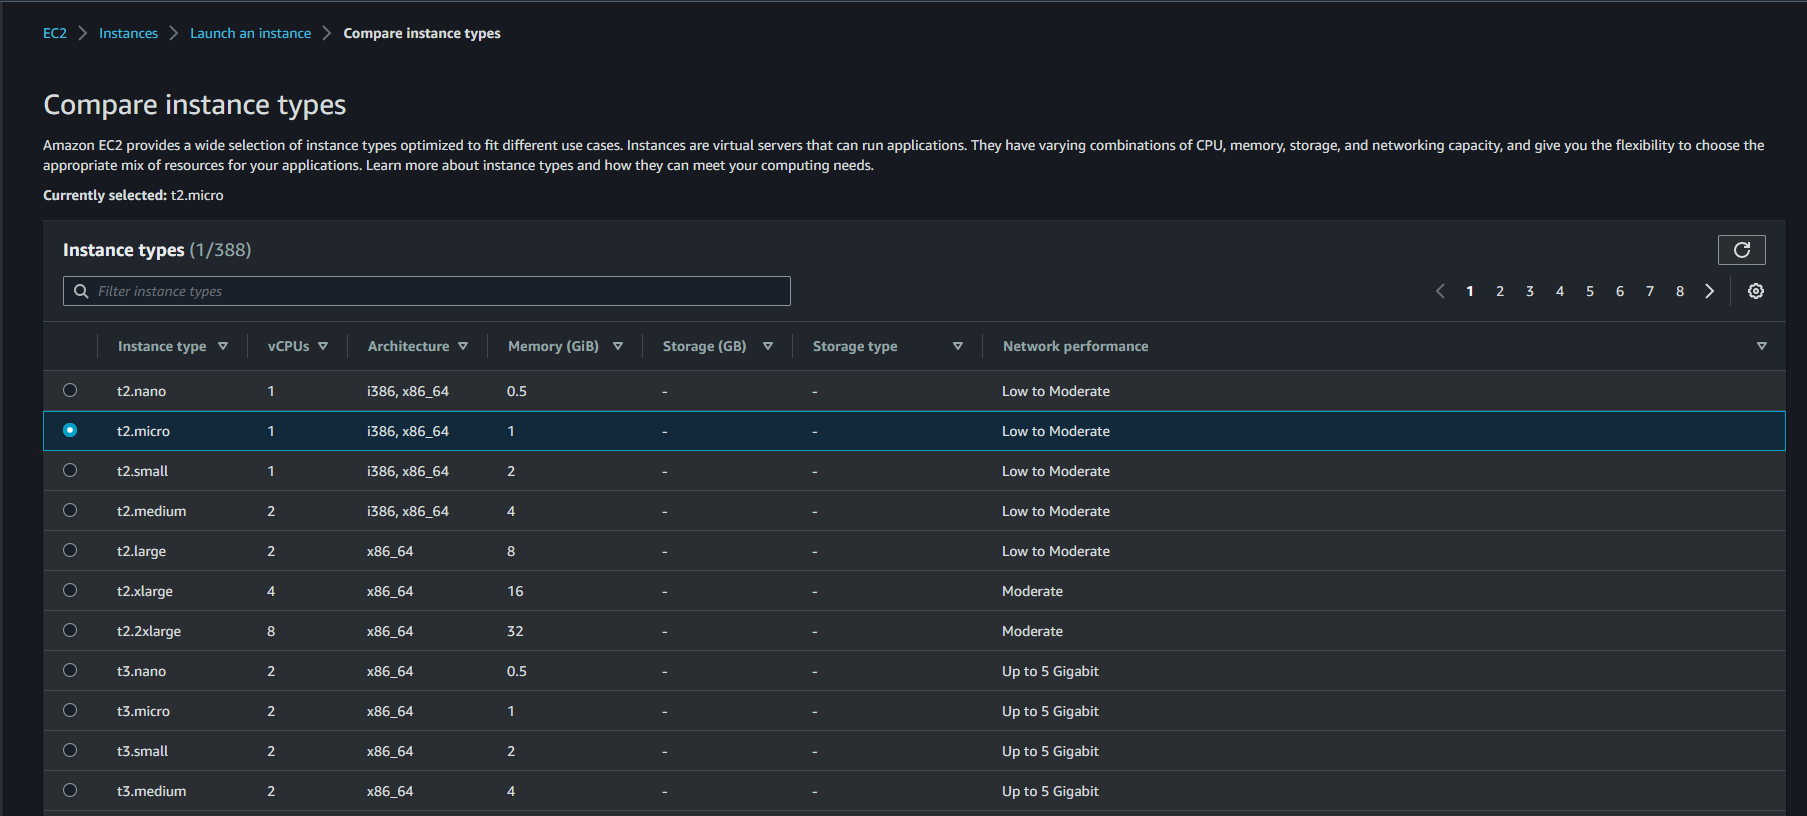
You can compare the instance types and choose according to that as below:
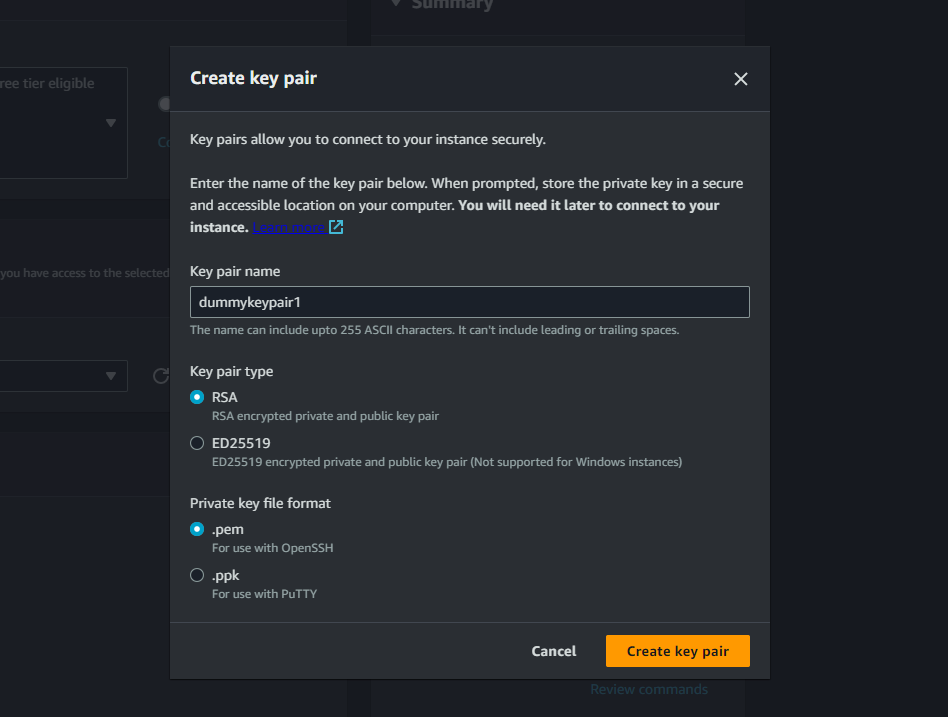
4)Next Step is to create a key pair and download it which allows us to connect instances securely.
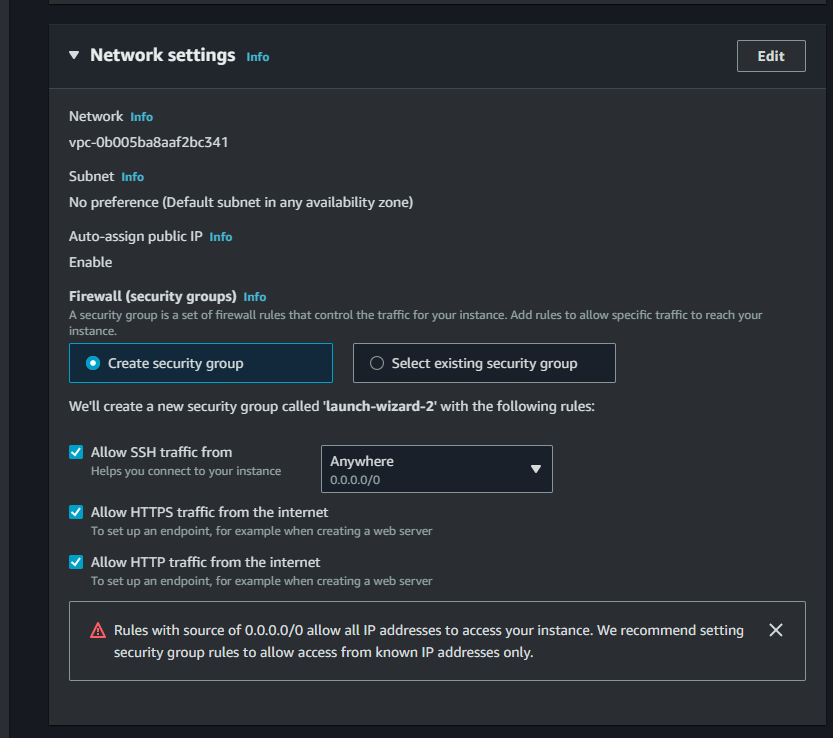
5)Now we need to create a security group as below make sure SSH access is enabled if not you cannot connect to the instance (there is another way like EC2 Connect without enabling the ssh we can still connect to the instance).
6)Configure your storage here by default for free tier-eligible customers can get up to 30GB of EBS SSD.
Here we need to change the option for Delete on Termination to no. Because when the instance got terminated the data will perish too.
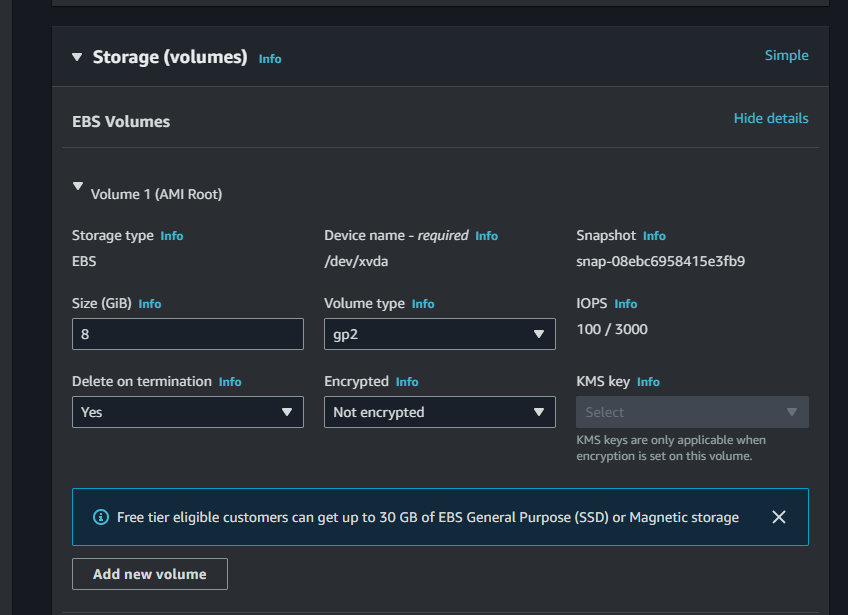
7)Now click on Launch instance and get back to the instances dashboard you can see our instance which is created was up and running.

Instance Summary
After successfully creating the we can see below :
Public IPv4 address, Private IPv4 address, instance type, Vpc id, and more (Note: Public IPv4 address will change whenever we reboot the instance. To make it static we need to make it an Elastic IP Address)
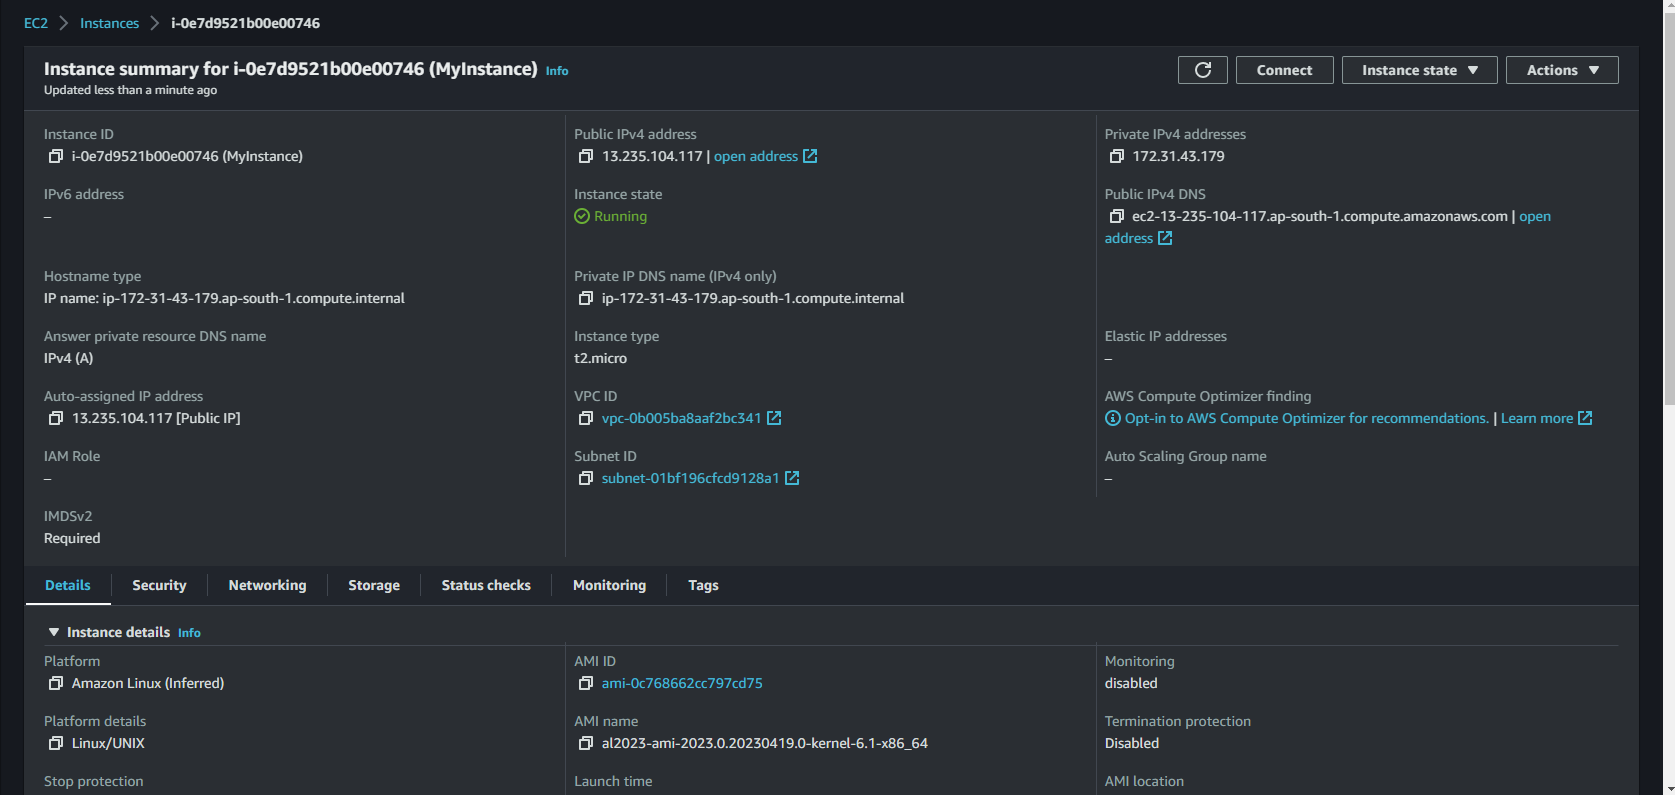
There are 5 instance states :
1)Start instance : It makes the instance up and running
2)Stop instance: It totally stops the instance.
3)Reboot instance : it reboots the instance
4)Hibernate instance: It totally stops the instance for some time all the data will be stored. we can set this behavior while configuring the instance.
5)Terminate instance: It totally terminates/kills the instance.

To change the instance type we need to stop the instance and go to Actions click on Instance settings we can modify it there.
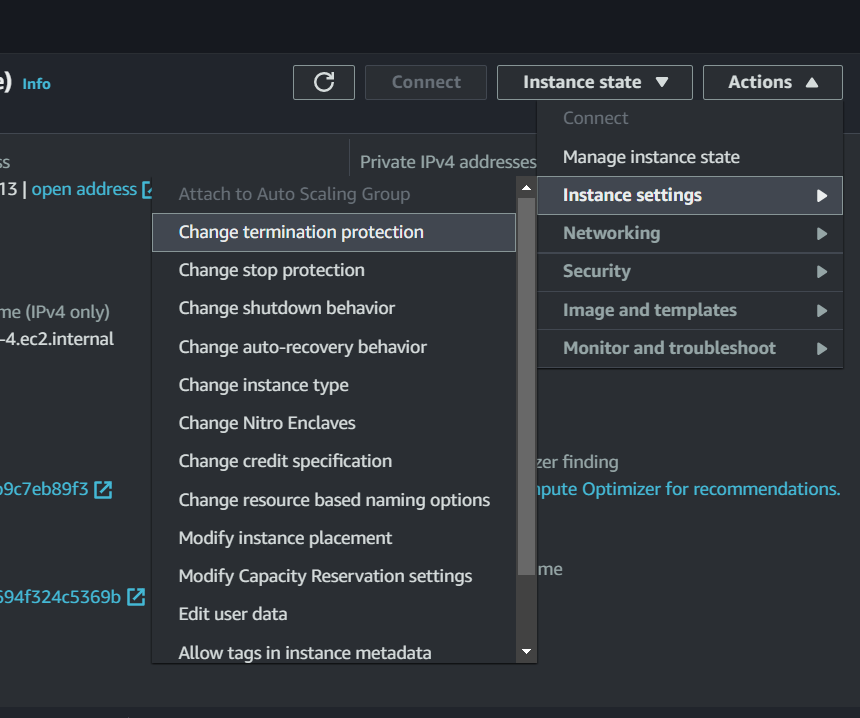
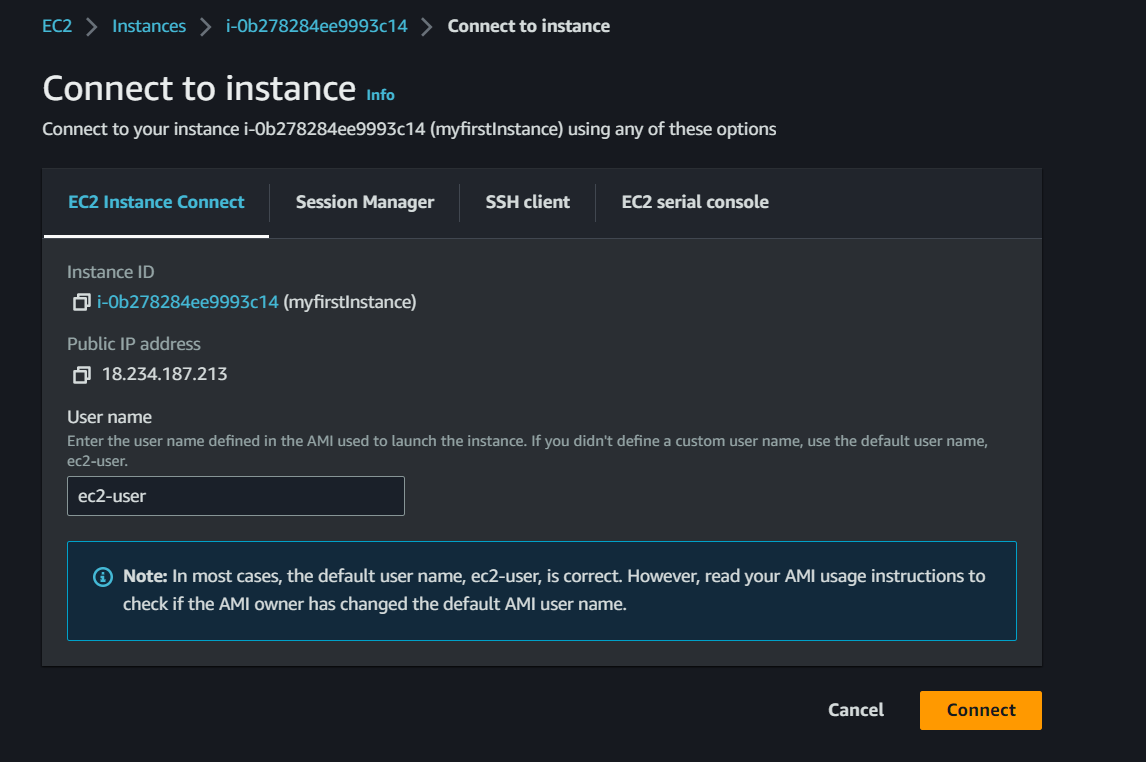
To connect to the instance we need to click on connect button(Note: for this, we don't need to make security with ssh allow access)
Enhanced networking
The command used to check information regarding the network driver
Newer generation instances by default use ENA as the network driver. Older generation instances use vif as a network driver.
[ec2-user@ip-172-31-43-179 ~]$ modinfo ena
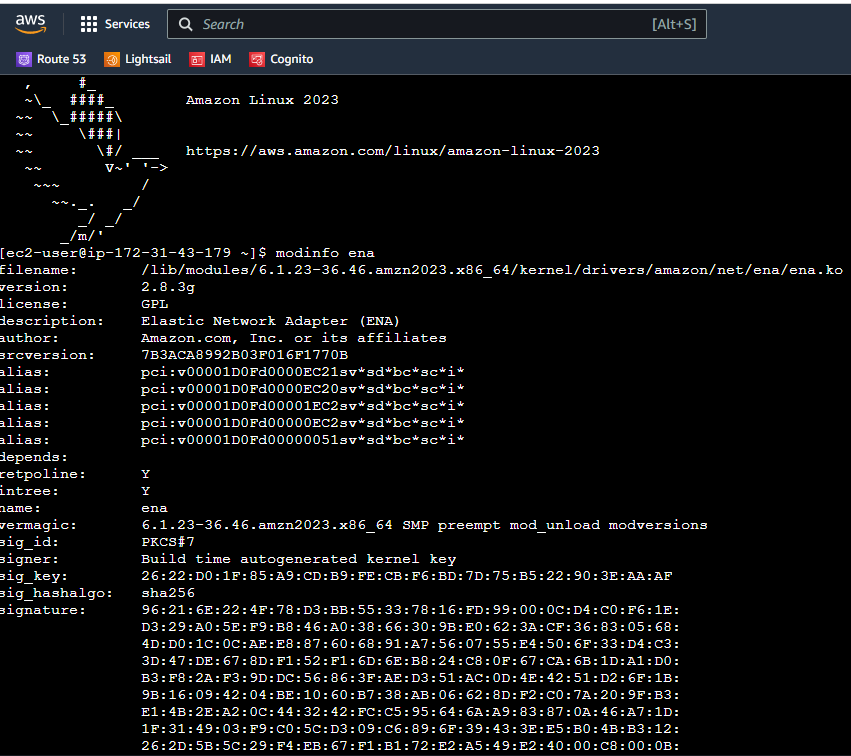
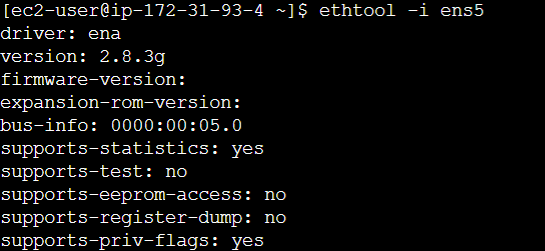
To check the driver info use the below command (Note: this command works for Amazon Linux 2023)
ethtool -i enX0 # for amazon linux 2023 and older generation instance
ethtool -i ens5 # for new generation instance
ethtool -i eth0 # for Amazon Linux 2022 and new generation instances
That's all Happy Instancing :)


